
Import Device and Profile
# Import Device and Profile
The eSIM profile data and AC data are fundamental for eSIM management on the platform, which can be imported by the following methods:
# 1.1 Batch Import Device and AC Data
Senario:
The user has profiles, and established the device (EID/IMEI) and the Activation Codes (ACs)
one-to-one correspondence.
Procedure:
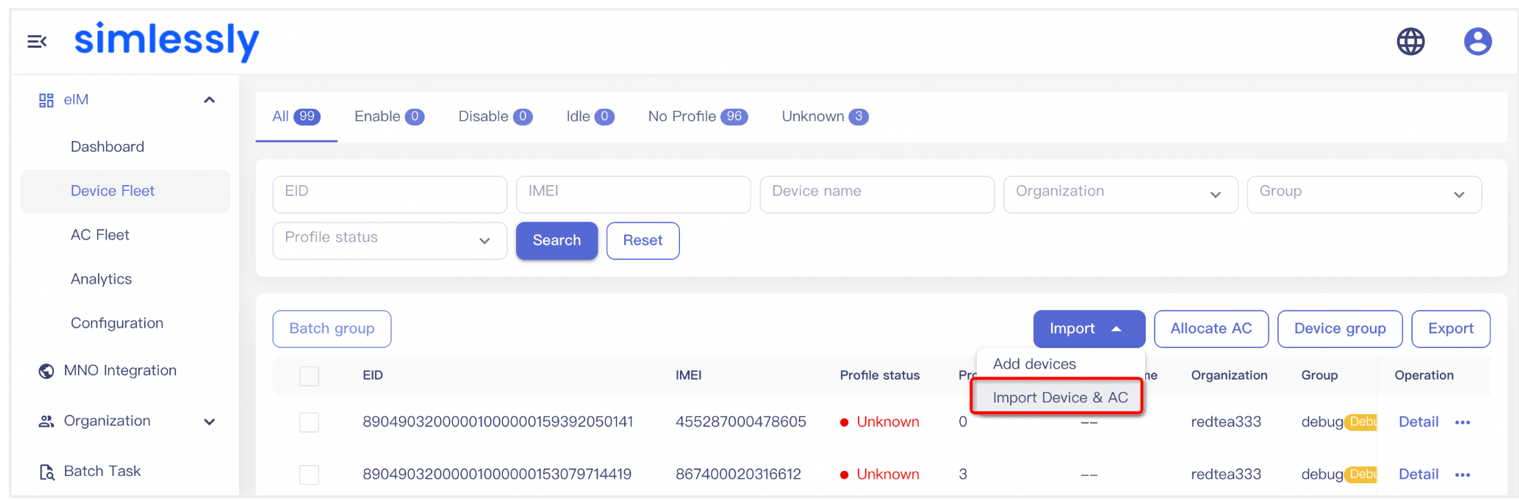
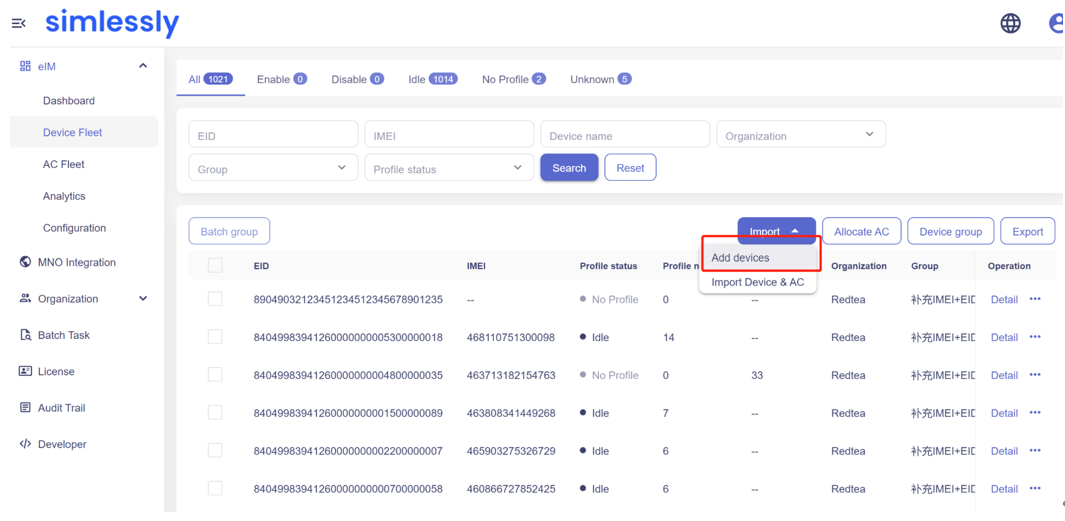
- Enter the Device Fleet page in the navigation tree, click Import -> Import Device & AC to enter the import window.
- Download Import template file.
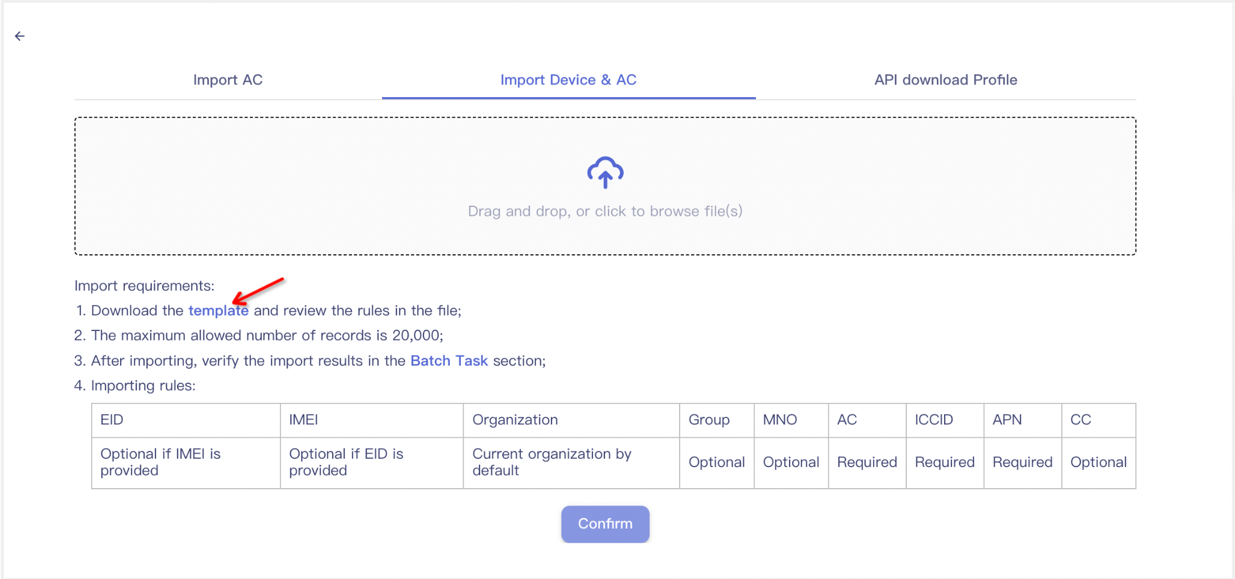
- Enter the data required in the template, including EID, IMEI, Organization, Group, MNO, AC, ICCID, APN, CC.
Import data verification rules:- If only one of EID or IMEI is known, you can choose to import one of them; you can also import both EID and IMEI. But if the imported EID does not match the IMEI , the device will report EID and IMEI upon power-on, and update the IMEI based on EID. If only EID is imported, the device will report the IMEI. If only IMEI is imported, the device will report the EID.
- Organization (optional): primary organization will be selected if not entered.
- If the entered device group name does not exist, a new group will be created, and the devices will be placed in this group after import.
- The platform supports 19-digit and 20-digit ICCID, depending on the digits of the ICCIDs provided by the operator.
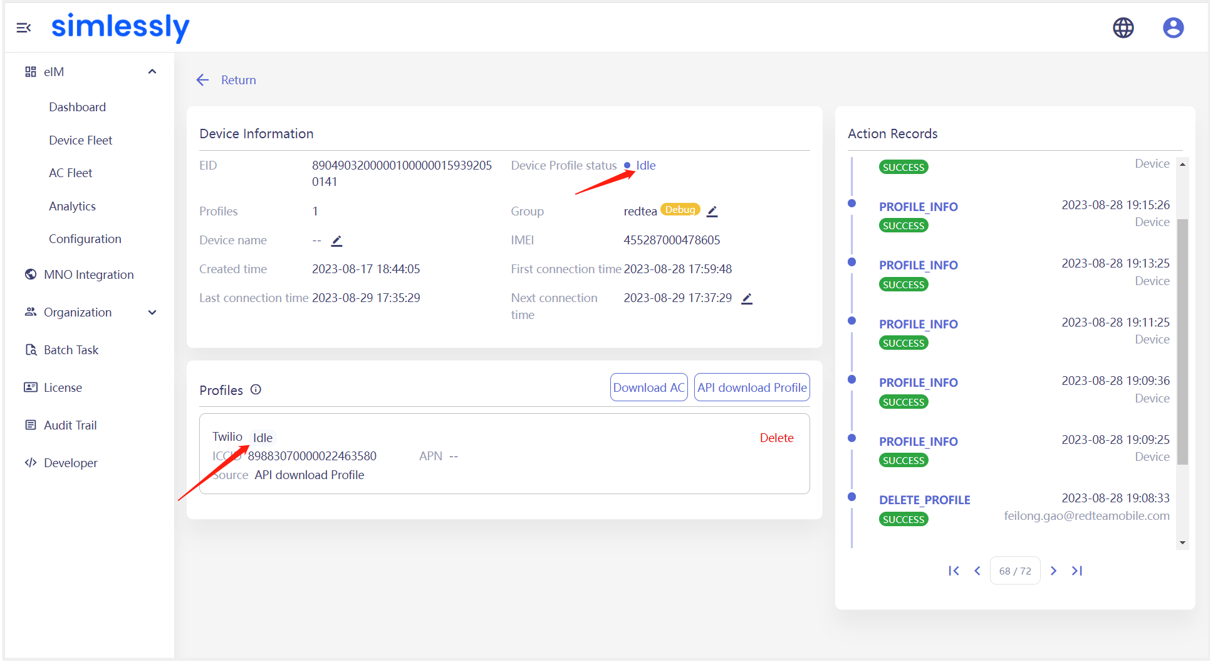
- The imported profiles will be displayed in the Device Fleet page, showing device information including EID and IMEI. Click Detail to enter the device details page, where the Profile will be displayed in "Idle" status.
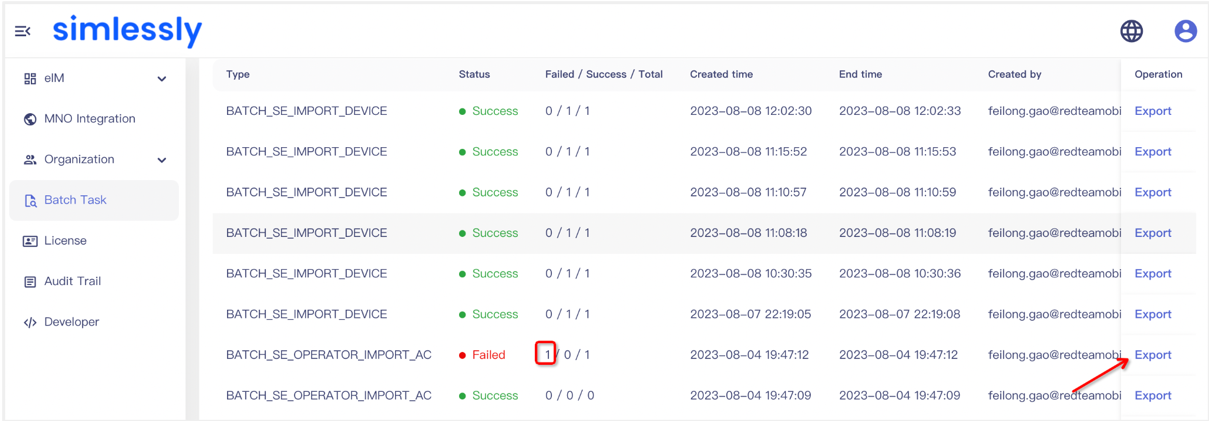
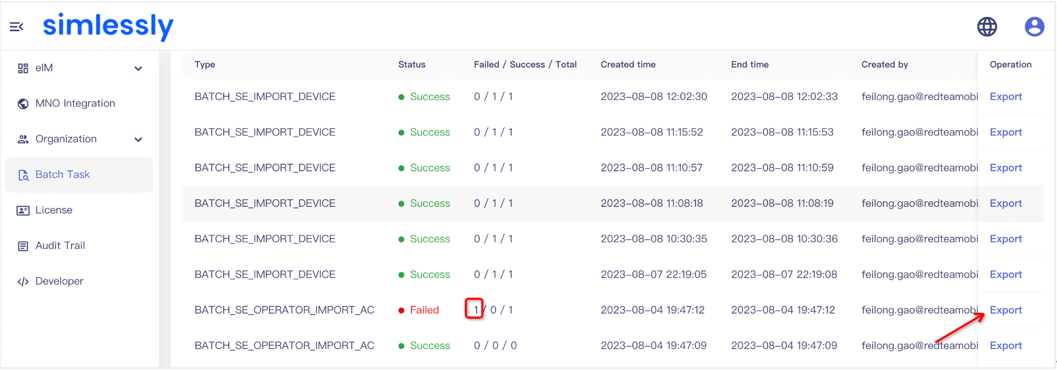
- Failed imports can be found in the Batch Task page with a corresponding task result of "Failed". Clicking on the Export option in the list, you can download an Excel file that provides the detailed error reasons. You can make the necessary modifications and import the data again.
- In an Excel sheet, only one AC can be imported for a device (EID/IMEI). If you need to add multiple ACs for a device, you can achieve this by either importing the same device with different ACs multiple times or by individually adding ACs in the device details page.
# 1.2 Import Device Then Manually Add AC
Senario: When the user only has devices but don’t have profiles, the user can import the profiles first, then add AC.
Procedure:
- In the Device Fleet page, click Import -> Add Devices to enter the import window.
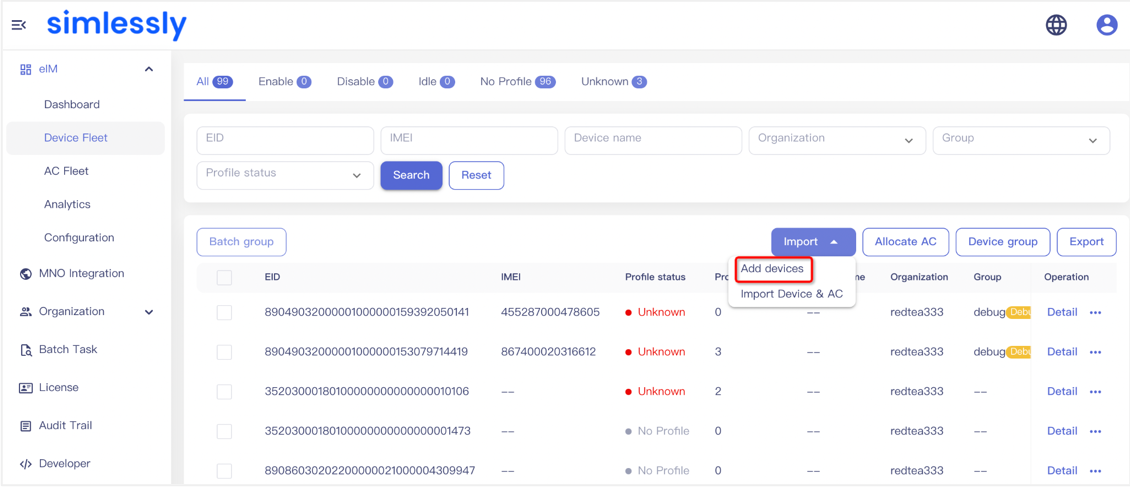
- Download Import template file.
- Enter the data required in the template, including EID, IMEI, organization and device group. The verification rules are the same as the description in the batch import profile and AC method.
- After successful import, click Detail in the device list to enter the details page, then click Download AC.
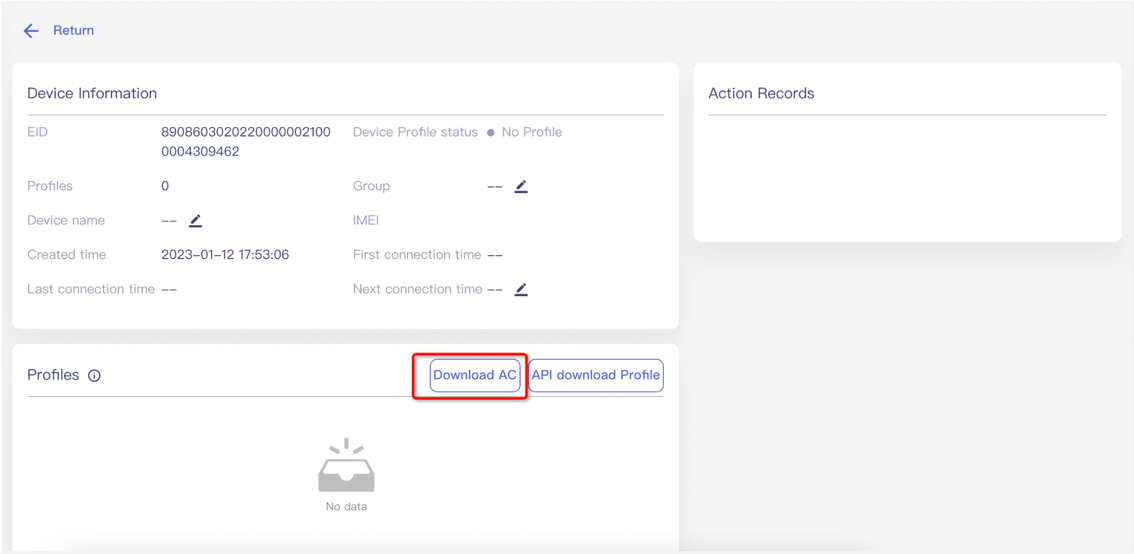
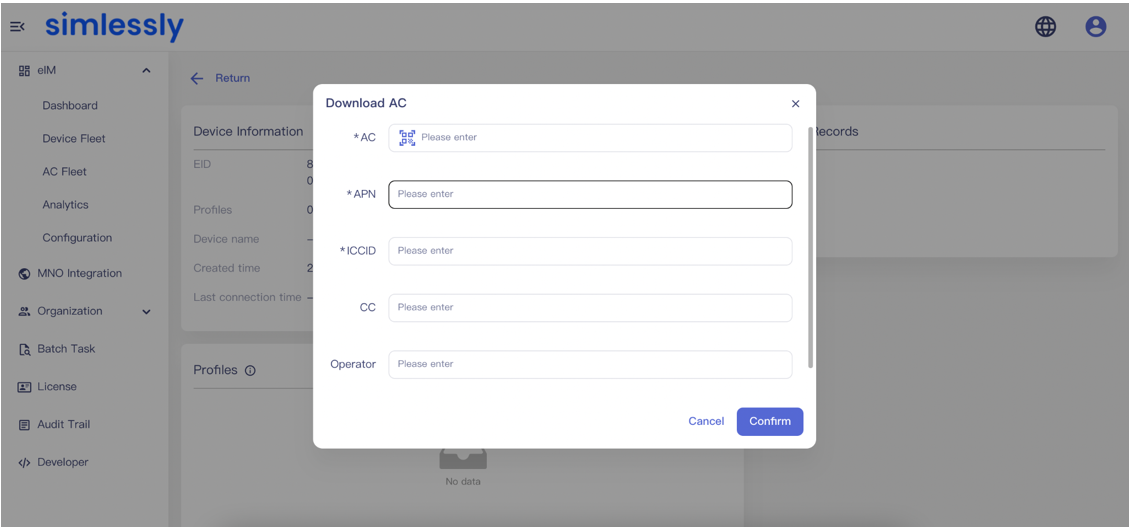
- Enter the AC information in the pop-up window.
 Note:
Note:
- AC: it supports uploading a QR image or directly inputting the AC information. This information is provided by the carrier.
- ICCID: it should be either 19 or 20 digits long, and cannot be the same as any existing ICCID in the system. The ICCID is provided by the carrier.
- APN: This field is mandatory and provided by the carrier. Please ensure it is filled in correctly.
- CC: This field is optional. If required, it should be provided by the carrier.
- Operator: name of the operator that provides the profile.
# 1.3 Import Device Then Request AC by API
Procedure:
- Import device. The procedure is the same as the procedure in the「Import Device Then Manually Add AC」 approach.
- Enter the MNO Integration page, select the operator that you need to authorize. Please make sure that you have obtained the permissions to access the operator’s OpenAPI interfaces.
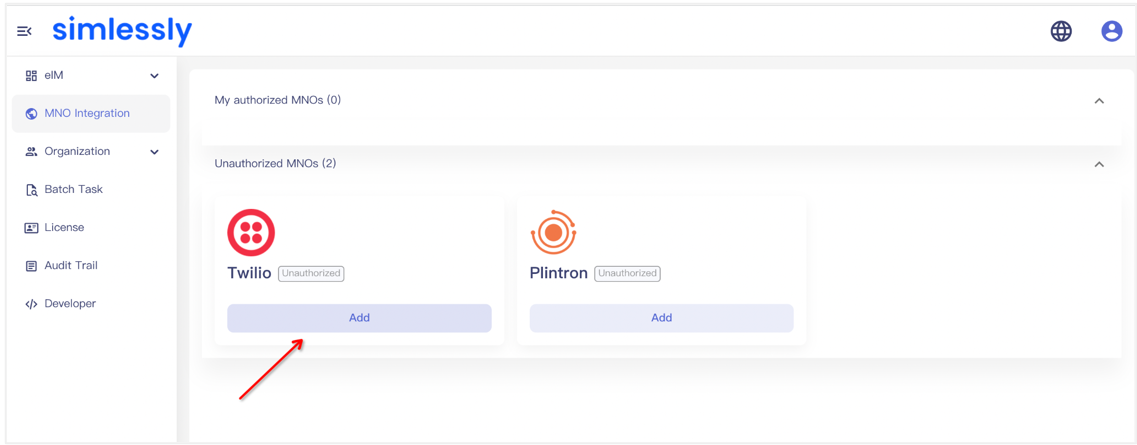
- Enter the information required for authentication. Be noted that the required information may vary among operators.
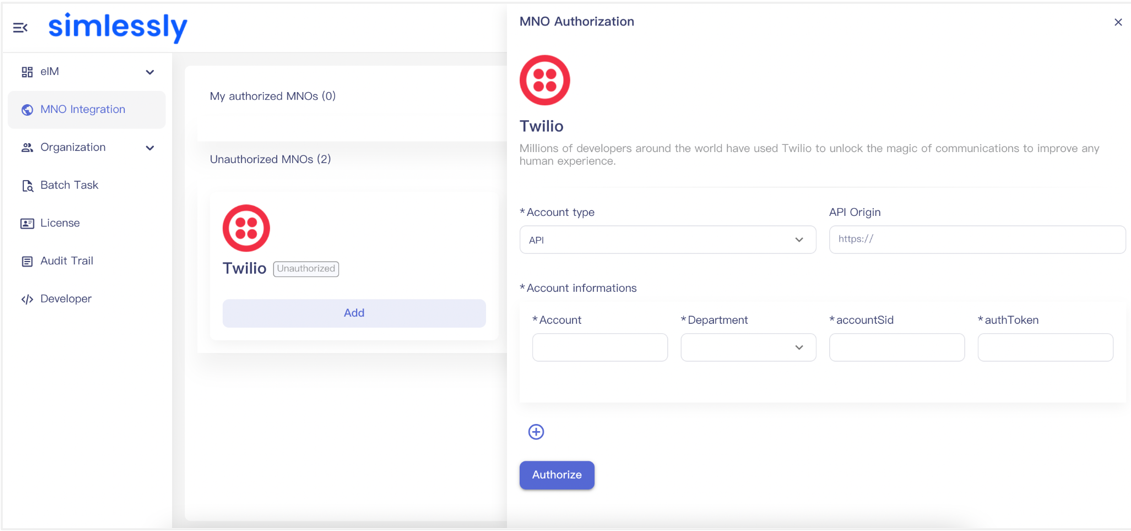
Twillo:
- Account: set up account name
- Department: If you don’t belong to an independent department, please select the first-level department.
- accountSid: A parameter provided by the operator.
- authToken: A parameter provided by the operator.
Plintron:
- Account: set up account name
- Department: If you don’t belong to an independent department, please select the first-level department.
- Access_key: A parameter provided by the operator.
- entity: A parameter provided by the operator.
- Request AC
- Enter the AC Fleet page in the navigation tree, click Add -> API Download Profile to enter the import window.
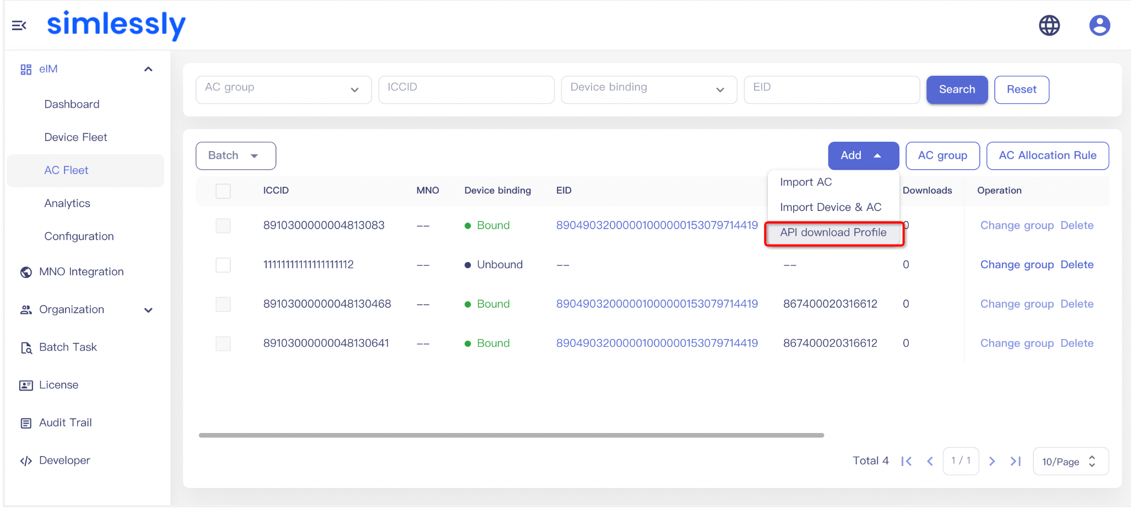
- Download the template file and fill in the required data. The fields may vary among operators. For example, operator Twilio requires EID and APN, and the EID must be imported to the platform in advance.
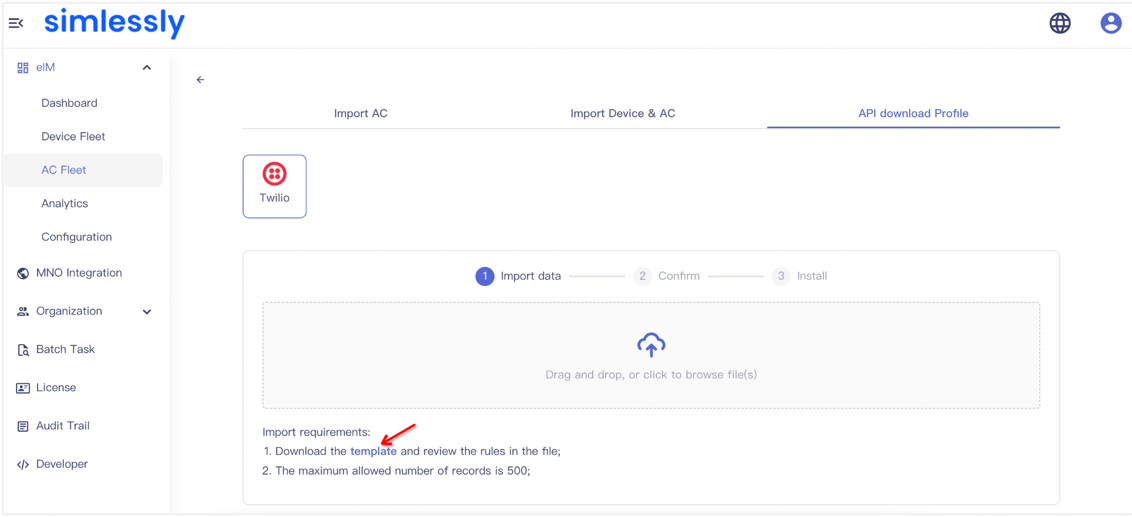

- Drag the filled template file to the upload zone. After successful upload, click Confirm and Install, then enter the Batch Task page to query the result of the task. Additionally, click Detail to query the information of the allocated Profile for the device in the Device Fleet page.
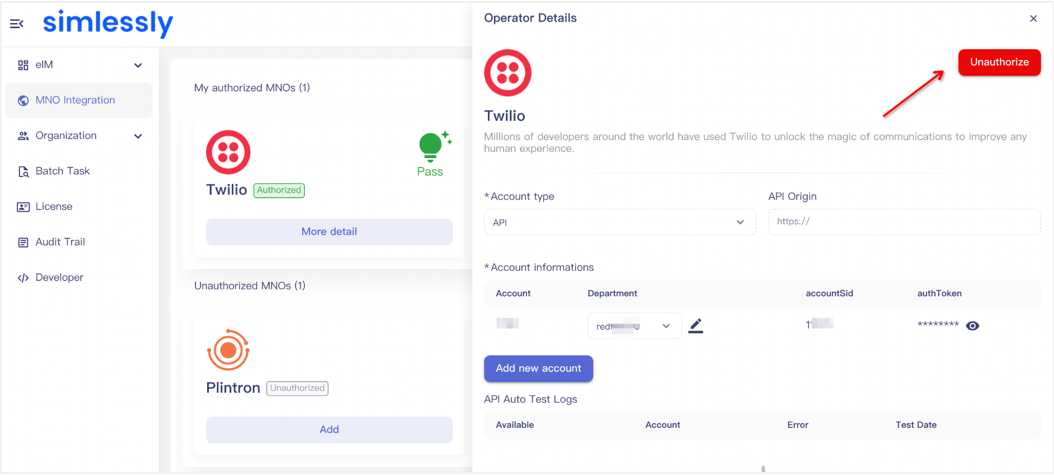
- If the platform prompts import failure in the Batch Task page, please check whether the authorization
information entered in the MNO Integration page is correct. If not, click More Detail -> Unauthorize in
that page to cancel the authorization, then reauthorize.
- Enter the AC Fleet page in the navigation tree, click Add -> API Download Profile to enter the import window.
# 1.4 Create Allocation Rule, auto-binding devices and ACs
Description:
Group devices and ACs. After configuring the device and AC allocation rules, the system/platform will
allocate grouped AC and devices randomly according to the allocation rules.
Scenario:
It is used for devices and ACs without specific one-to-one correspondence, but with device respectively
information. Eg. EID/IMEI/ICCID/APN
Procedure:
- Import devices
- In Device Fleet, click Import -> Add devices, enter the import window
- Download template
- Enter the data required in the template, including EID, IMEI, organization and device group, and upload the template
- Import status can be checked in the Batch Task page.
- In Device Fleet, click Import -> Add devices, enter the import window
- Import AC
- In AC fleet, click Add -> Import AC, enter import window
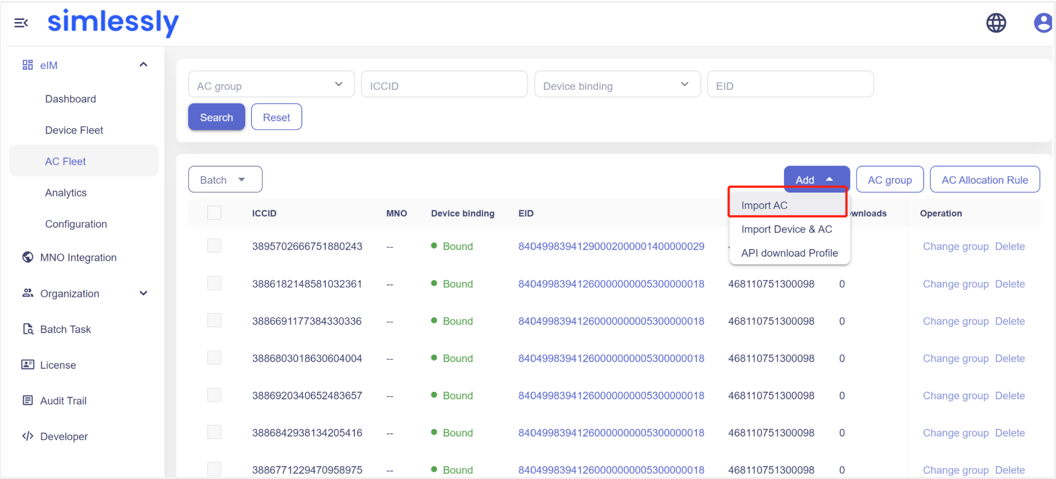
- Download template
- Fill up required information: AC, ICCID, APN, CC, AC group, MNO, and upload template.
- Data successfully imported will be shown in the AC fleet, the import status can be checked in the Batch Task page. Note: There is no requirement on the importing sequence on devices and ACs.
- In AC fleet, click Add -> Import AC, enter import window
- Create AC allocation rules, binding Devices and ACs
- At AC fleet page, click AC Allocation Rule
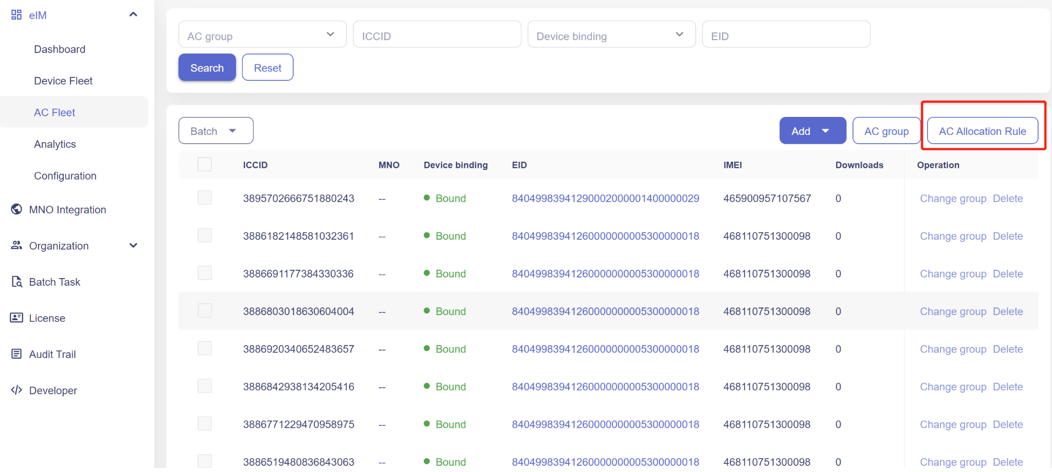
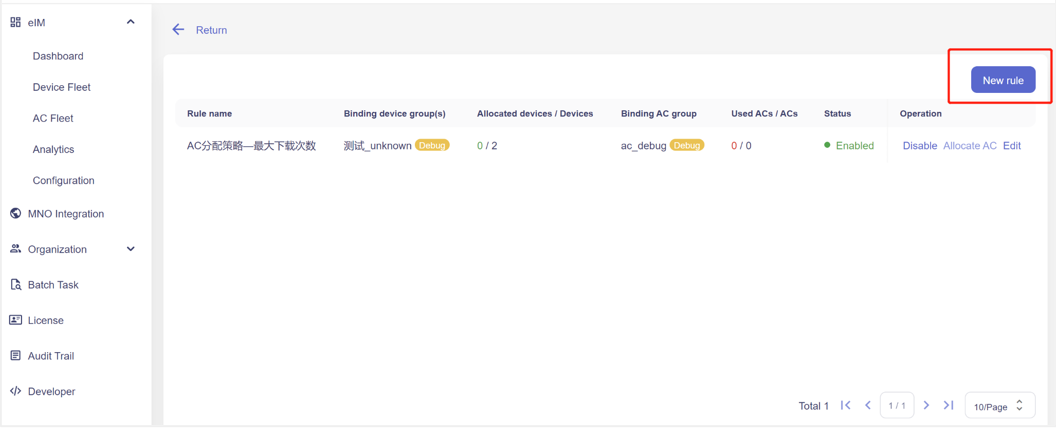
- Select the AC group and Device group that need to be bound by rules.
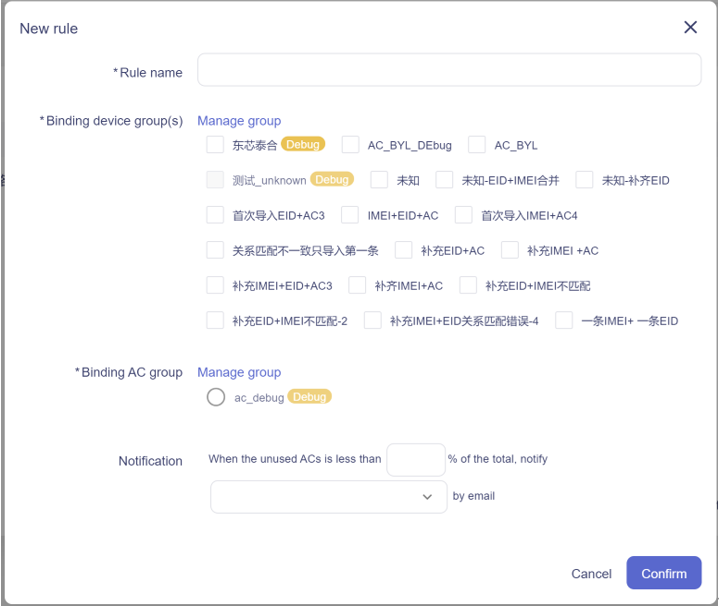 Note:
1.AC group and device group need to be created before this step. Either through template or manual grouping.
Note:
1.AC group and device group need to be created before this step. Either through template or manual grouping.
2.Make sure the number of ACs in the AC group is bigger or equal to the number of devices, otherwise allocation will be failed. - Click Allocate AC, ACs and devices will be automatically binded after confirmation.

- After successfully binding, the assigned AC will be shown in the Detail page of Device, The initial status is “Idle” and the Download Profile task is in TO_BE_PROCESSED status in Action records.
- At AC fleet page, click AC Allocation Rule